Guide: How to Setup a UniFi Camera Deployment
Are you looking to install UniFi cameras to enhance security for your home or business? This comprehensive guide will walk you through every step of the process, ensuring a seamless setup. Check out our visual guide below to optimise your camera security system effectively.
Visual Guide to Setup your UniFi Camera Deployment

SHARE NOW
Step 1: Prepare the Site
Before installing your UniFi cameras, carefully evaluate the site:
- Field of View: Ensure each camera covers the desired area. Avoid blind spots.
- Lighting: Select locations with sufficient lighting or consider cameras with low-light capability, like the UniFi G5 Bullet.
- Power Needs: Confirm access to power outlets or plan for Power over Ethernet (PoE) connections. Ubiquiti have made installation simpler with PoE compatibility across many of their cameras.
Pro Tip: Use a site plan to map out your camera placements for maximum coverage.
Step 2: Setup the UniFi Console and Storage
Your UniFi system needs a reliable central console and storage solution to operate efficiently.
- Select the Console: Choose between options like the UniFi Dream Machine Pro or UniFi CloudKey+. Check out the full UniFi Cloud Gateway and UniFi CloudKey and Gateways ranges.
- Storage Solution: Opt for the UniFi Network Video Recorder or other network-ready devices to meet your retention needs. The UniFi Protect software makes it easy to manage and scale storage based on the number of cameras and required recording duration.
Pro Tip: Scale your storage based on the number of cameras and required recording duration.
Step 3: Deploy Your UniFi Cameras
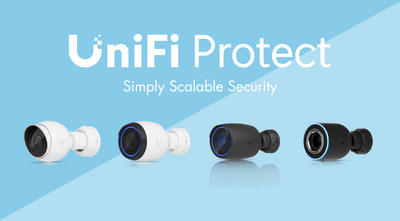
UniFi offers a variety of cameras designed for different scenarios:
- Dome & Turret: Compact and discreet, perfect for environments requiring a wide field of view.
- Bullet: Versatile and ideal for most installations, especially in low-light conditions with infrared capability.
- Compact: Sleek and unobtrusive, providing flexibility for various setups.
- Theta: Designed for discreet applications, ideal for locations where intrusiveness is a concern.
- PTZ: High-performance, capable of detailed surveillance with pan, tilt, and zoom functionality.
- G5 PRO: Perfect for critical areas, offering 4K video quality.
- G5 DOME: Compact and sleek for discreet setups with a wide field of view.
- G5 BULLET: Versatile and ideal for most installations, especially in low-light conditions with infrared capability.
Pro Tip: Match camera types to their specific roles for optimised performance.
Step 4: Configure Camera Settings
Fine-tuning your camera settings is essential for a robust system:
- Name Each Camera: Assign descriptive names like "Front Entrance" or "Storage Room".
- Resolution Settings: Balance high resolution with storage capacity.
- Recording Modes: Choose between continuous or motion-triggered recording.
- Retention Settings: Adjust storage duration to comply with your security needs. The UniFi Protect app makes it easy to manage these kinds of settings.
Pro Tip: Use the UniFi Protect app for a user-friendly configuration process.
Step 5: Test and Optimise
After setting up the hardware and configuring the software, conduct tests to ensure everything works as intended:
- Check Camera Feeds: Confirm the quality and coverage of each camera.
- Adjust Angles: Fine-tune camera positioning for optimal field of view.
- Optimise Connectivity: Ensure strong network signals to avoid dropped footage.
Pro Tip: Schedule periodic checks to maintain system performance.
Step 6: Monitor and Maintain
Your security system is an ongoing project. Regular monitoring and updates are crucial:
- Monitor Feeds: Use the UniFi Protect app for real-time surveillance and alerts.
- System Updates: Keep your firmware and software up-to-date.
Pro Tip: Enable remote access for easy monitoring while away from your property.
Want to discover how to setup a complete UniFi deployment? Check out our guide here to learn more.
|
||
|


